The short answer: a proper Discord server setup guide starts with verification level, content filter, roles, channel categories, and invite settings, then moves to AutoMod, bots, and community features. Get these 10 essential settings right on day one and your server will practically run itself. This Discord server setup guide walks you through each setting step by step, explains why it matters, and shows you the exact menus to open in the 2026 Discord app.
Last updated: October 2026. Steps verified against the current Discord desktop and mobile apps.
Also Read

Contents In This Article
- Why Your Discord Server Setup Matters
- 1. Set the Right Verification Level
- 2. Turn On the Explicit Media Content Filter
- 3. Create Roles Before You Need Them
- 4. Organize Channels Into Categories
- 5. Configure Invite Settings for Steady Growth
- 6. Set Up the Welcome Screen
- 7. Enable AutoMod Rules
- 8. Add a Moderation Bot
- 9. Tune Default Notification Settings
- 10. Turn On Community Features
- Discord Server Setup Checklist
- Frequently Asked Questions
- Conclusion
Why Your Discord Server Setup Matters
Most Discord servers fail for boring reasons. Not drama, not lack of members, just bad setup. New members join, see a chaotic channel list, get pinged 40 times a day, and quietly leave. A solid Discord server setup guide prevents all of that before your first real member even arrives.
Think of server setup like arranging furniture before guests come over. You would not invite people into a house with no chairs. In the same way, you should not invite people to a server with no roles, no rules channel, and default notification settings that spam everyone. That is why following a proper Discord server setup guide from the start saves so much trouble. The 10 settings in this Discord server setup guide take about 30 minutes to configure, and they save you hours of cleanup later.
One more thing: every setting here works on both the free and paid versions of Discord. You do not need Nitro or server boosts to follow this Discord server setup guide. Boosts add perks later, but the foundation this Discord server setup guide covers is completely free.
1. Set the Right Verification Level
The verification level decides how much proof Discord demands before someone can chat in your server. It is your first line of defense against spam accounts and raid bots. You will find it under Server Settings > Moderation > Verification Level.
Discord offers five levels:
- None: No restriction. Anyone who joins can type immediately.
- Low: Members must have a verified email on their Discord account.
- Medium: Members must be registered on Discord for more than 5 minutes.
- High: Members must be in the server for more than 10 minutes.
- Highest: Members must have a verified phone number on their account.
What to pick: For a new public server, start with Low. It blocks the laziest spam bots (the ones with unverified emails) without annoying real people. If you get raided, bump it to Medium temporarily, then lower it back once things calm down. This flexible approach is why the Discord server setup guide recommends starting low. The Highest level is overkill for most communities and will turn away legitimate members who do not want to share their phone number.
Why this matters: verification level is the cheapest moderation you will ever configure. It runs silently in the background, and you will never know how many junk accounts it stopped. Skip it, and you will learn what a raid looks like at 2 AM. Every Discord server setup guide worth reading puts verification first for this exact reason.
2. Turn On the Explicit Media Content Filter
Right below the verification level, you will see the Explicit Media Content Filter. Turn it on. Set it to “Scan media content from all members.” This makes Discord automatically scan images and videos for explicit content and delete the worst offenders before anyone sees them.
To enable it: Server Settings > Moderation > Explicit Media Content Filter, then choose the strictest option.
Why this matters: you are legally and morally responsible for what appears in your server. One explicit image posted by a troll can get your server reported, and in serious cases, removed. The filter is not perfect, it misses some things and occasionally flags harmless images, but it catches the obvious stuff while you sleep. Pair it with a human moderator for anything it misses. This Discord server setup guide treats the content filter as non-negotiable.
A quick note for family-friendly servers: mention in your rules channel that the filter is active. Parents appreciate knowing it, and it sets expectations for younger members.
3. Create Roles Before You Need Them
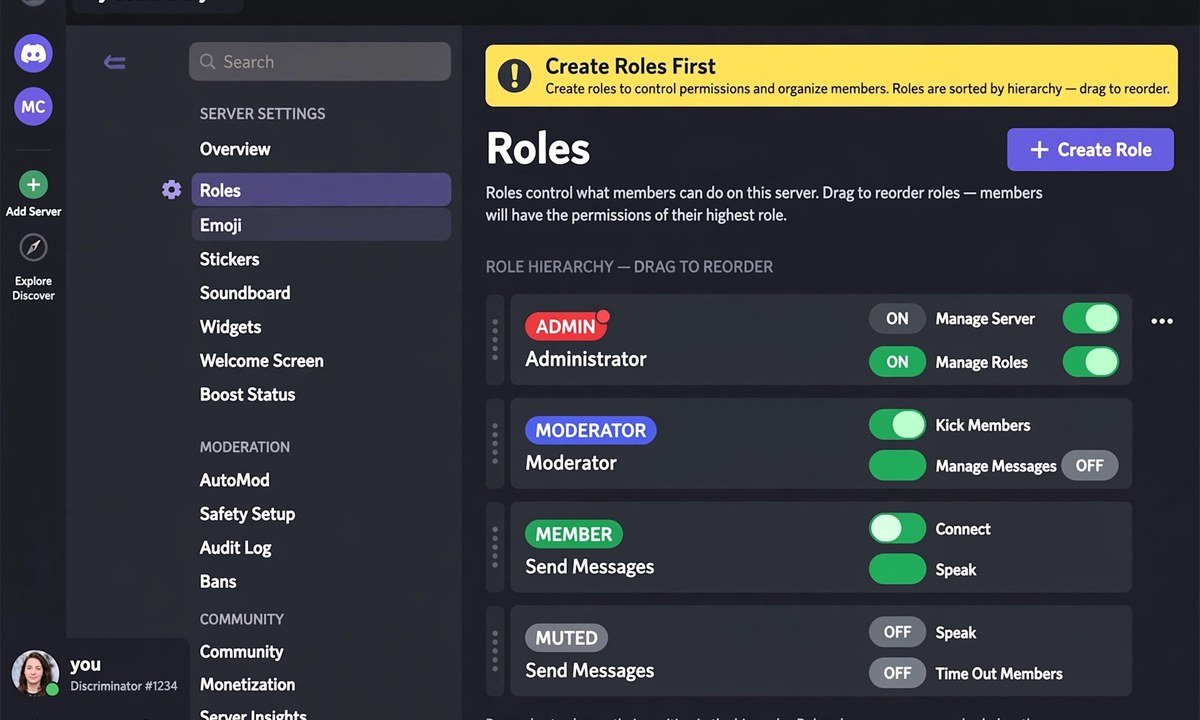
Roles are the permission system of your Discord server. They decide who can do what: who can ban, who can post in announcements, who can use voice channels. The mistake most admins make is creating roles only after a problem happens. This Discord server setup guide says it clearly: create them now, while the server is calm.
Go to Server Settings > Roles and create at least these four:
- Admin: Full control. Give this to one or two people you trust completely. Admins can change server settings, manage roles, and ban members.
- Moderator: Can kick, mute, and delete messages, but cannot change server settings or manage roles above them. Your day-to-day peacekeepers.
- Member: The default role for everyone who joins. Can chat, react, and join voice. Cannot manage anything.
- Muted: Cannot send messages or speak in voice channels. You will use this for timeouts instead of banning people outright.
Order matters. Discord applies permissions from top to bottom in the roles list, so drag Admin to the top, then Moderator, then Member, then Muted at the bottom. A role can only manage roles below it, which is why this order keeps your hierarchy safe. Getting roles right early is a core lesson of any good Discord server setup guide.
Why this matters: when your server grows from 20 members to 200, you will need moderators fast. If roles already exist, promoting someone takes 10 seconds. If they do not, you will be building a permission system during a crisis. This Discord server setup guide puts roles at number 3 for a reason: everything after this assumes roles exist.
4. Organize Channels Into Categories
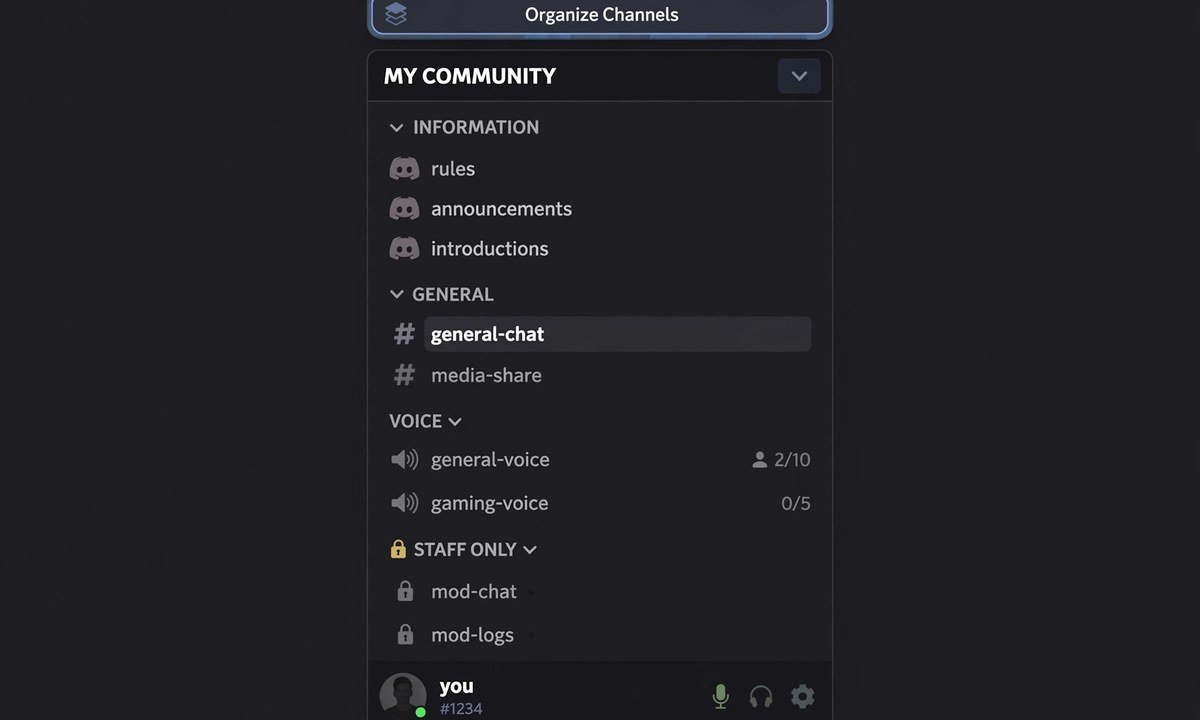
A flat list of 25 channels scares new members. Categories group related channels under collapsible headers, so your server looks clean even as it grows. Create them under Server Settings > Channels, or right-click the channel list and choose “Create Category.”
A starter layout that works for most communities:
- INFORMATION: rules, announcements, introductions
- GENERAL: general-chat, media-share, off-topic
- VOICE: general-voice, gaming-voice, study-room
- STAFF ONLY: mod-chat, mod-logs (private, visible only to Admin and Moderator roles)
Three rules for channels. First, every server needs a #rules channel. Write 5 to 8 short rules, pin them, and set the channel so members can read but not type. Second, keep an #announcements channel where only admins can post, so important updates never drown in chat. Third, do not create channels for topics nobody discusses yet. Five active channels beat twenty empty ones. Remember this rule from the Discord server setup guide whenever you feel tempted to add more.
Why this matters: first impressions happen in seconds. A new member who sees a tidy category structure thinks “this place is well run.” One who sees a wall of random channels thinks “this place is dead” and leaves. Channel organization is the interior design of your Discord server setup guide.
5. Configure Invite Settings for Steady Growth
Invites are how members arrive, so this Discord server setup guide recommends configuring them deliberately instead of accepting Discord’s defaults. The default invite link expires after 7 days, which is fine for inviting friends right now but terrible for a link you put on your website or social media bio.
For your permanent public invite: open your server, click Invite People, then Edit invite link. Set Expire After to Never and Max Uses to No limit. Generate the link and use it everywhere public. Discord’s official invite settings guide explains every option if you want the full details.
For temporary invites (events, collaborations), do the opposite: short expiry, limited uses. A 24-hour link with 50 max uses is perfect for a weekend tournament. When it dies on its own, you do not have to remember to clean it up.
Pro tip from this Discord server setup guide: create one invite per source. Make a separate link for your website, your YouTube channel, and your Instagram bio. Discord shows you how many members joined through each link, so you will learn exactly which source sends real people and which one sends nobody. Tracking invite sources is an advanced tip most Discord server setup guides skip.
Why this matters: invite settings are the faucet that controls your member flow. Permanent links for permanent placements, temporary links for temporary events. Get this wrong and you will either wonder why nobody joins (expired default link on your website) or wonder where all the spam came from (unlimited link posted in the wrong place).
6. Set Up the Welcome Screen
The Welcome Screen is the first thing new members see when they open your server. It shows your server description and lets them pick which channels interest them. You will find it under Server Settings > Overview > Welcome Screen (it appears once your server meets the basic requirements).
A good welcome screen has three parts:
- A one-line description of what your server is about. Example: “A friendly community for mobile gamers in India. Chat, find squad mates, and join weekly tournaments.”
- 2 to 4 recommended channels with a short line each explaining what happens there. Point newcomers at #rules first, then your most active channels.
- A friendly tone. This is a greeting, not a legal document. Write like a host, not a bouncer.
Why this matters: most new members decide within 30 seconds whether to stay. A blank server with no guidance feels abandoned. A welcome screen that says “start here, then go there” turns a confused visitor into an engaged member. It is the highest-impact 5 minutes in this entire Discord server setup guide, so do not skip it even if you are in a hurry.
7. Enable AutoMod Rules
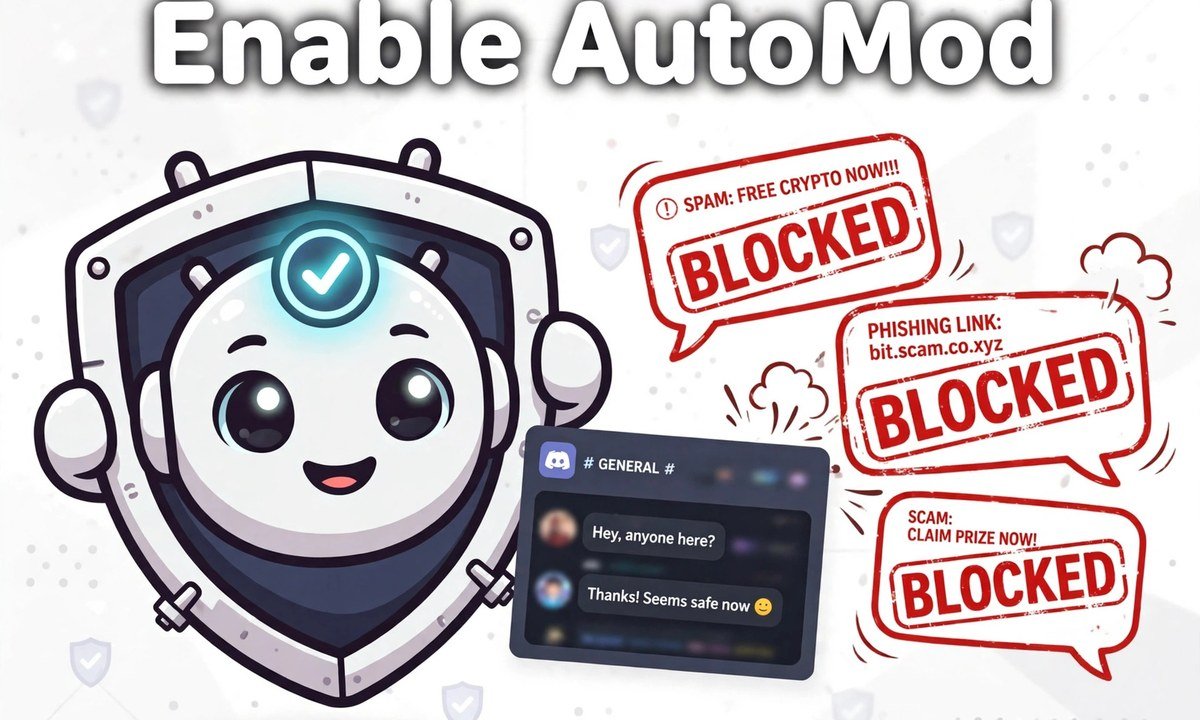
AutoMod is Discord’s built-in automatic moderation. It scans messages for spam, banned words, and suspicious links, then acts on them instantly, before any human moderator sees them. Find it under Server Settings > Moderation > AutoMod.
Start with these three default rules:
- Block spam content: Catches message floods, repeated text, and mass mentions. Turn this on first. It is the single most useful AutoMod rule.
- Block flagged words: Discord maintains a list of commonly flagged terms. Enable it, then add your own custom words for your community’s specific needs.
- Block suspected spam links: Stops the classic “free Nitro” scam links before anyone clicks them.
For each rule, choose what happens when it triggers. “Block message” deletes it silently. “Send alert” posts a notice in your mod-log channel so your team can review. For a new server, use “Block message” for spam and “Send alert” for flagged words, so you can tune the word list without members noticing false positives.
Why this matters: AutoMod is a moderator who never sleeps, never takes a day off, and reacts in milliseconds. It will not replace human judgment, but it handles the obvious junk so your human mods can focus on actual community issues. Every Discord server setup guide in 2026 should include AutoMod, because spam bots in 2026 are faster than human reflexes. If your Discord server setup guide does not mention AutoMod, it is outdated.
8. Add a Moderation Bot
AutoMod handles the basics, but a dedicated moderation bot adds the features Discord does not include: timed mutes, warning systems, custom commands, and detailed logging. The two most popular choices are MEE6 and Dyno, and both have free tiers that cover everything a new server needs.
To add one:
- Visit the bot’s official website (mee6.xyz or dyno.gg) in your browser.
- Click Add to Discord and log in if prompted.
- Select your server from the list and authorize the permissions it asks for.
- Complete the setup on the bot’s dashboard: enable the moderation module, set your mod-log channel, and configure at least the !warn, !mute, and !kick commands.
Start with just the moderation features. Bots like MEE6 also offer leveling systems, custom commands, and music playback, but every extra feature is another thing to configure and another thing that can break. Add the fun stuff after your moderation foundation is solid.
Why this matters: a bot gives your moderators superpowers. Instead of manually tracking who was warned twice, the bot keeps count. Instead of remembering to unmute someone in an hour, the bot does it automatically. As your server grows past 100 members, a moderation bot stops being optional and becomes essential. Setting it up now, while things are quiet, means it is ready when you actually need it. That is the whole philosophy behind this Discord server setup guide: prepare during peacetime.
9. Tune Default Notification Settings
Nothing kills a server faster than notification spam. If every message in every channel pings every member’s phone, people will mute your entire server within a day, and muted members do not come back. Fix this under Server Settings > Overview > Default Notification Settings.
Change the default from “All Messages” to “Only @mentions.” This single change is the most underrated setting in this whole Discord server setup guide. Members will still get notified when someone mentions them directly or uses @everyone, but casual chatter will not buzz their phone at midnight.
Then go one step further: for your #announcements channel specifically, right-click it, choose Edit Channel > Permissions, and make sure only admins can post there. Announcements should be rare and important. If members get pinged for announcements twice a month, they will actually read them. If they get pinged daily, they will mute the channel.
Why this matters: you are competing for attention with every other app on your members’ phones. A server that respects their attention earns a permanent spot. A server that spams them gets muted, then forgotten, then left. Notification settings are a retention tool disguised as a technical option. A Discord server setup guide that ignores notifications is missing the biggest retention lever you have.
10. Turn On Community Features
Community features unlock Discord’s best tools for growing servers: the Welcome Screen you already set up, Membership Screening (rules members must accept before chatting), Server Insights (analytics showing where members come from), and Discovery (listing your server publicly). Enable them under Server Settings > Overview > Enable Community.
Discord will ask you to complete three requirements first:
- Enable the content filter for all members (you did this in setting 2).
- Set up a rules or guidelines channel (you did this in setting 4).
- Set up a community updates channel where Discord sends you safety notices.
Once enabled, turn on Membership Screening under Server Settings > Moderation > Membership Screening. Write 2 to 4 short rules that new members must explicitly accept before they can chat. This does two things: it makes members actually read your rules (accepting feels more binding than scrolling past), and it gives you a clear basis for moderation later. “You agreed to rule 3 when you joined” ends arguments fast.
Why this matters: Community features are the difference between a chat room and a real community. Insights alone are worth it, because they show you which invite links bring members who stay versus members who leave in a day. And Membership Screening quietly filters out the people who were never going to follow your rules anyway. With all 10 settings done, your Discord server setup guide journey is almost complete.
Discord Server Setup Checklist
Finished all 10 settings? Run through this quick checklist to make sure nothing slipped through. Print it, screenshot it, or keep it open while you verify each item from this Discord server setup guide.
| # | Setting | Done? |
|---|---|---|
| 1 | Verification level set to Low (or higher) | ☐ |
| 2 | Explicit media content filter on for all members | ☐ |
| 3 | Roles created: Admin, Moderator, Member, Muted | ☐ |
| 4 | Channels organized into categories, #rules exists | ☐ |
| 5 | Permanent invite link created (Never expire, No limit) | ☐ |
| 6 | Welcome screen with description and channel picks | ☐ |
| 7 | AutoMod rules enabled (spam, flagged words, links) | ☐ |
| 8 | Moderation bot added and basic commands configured | ☐ |
| 9 | Default notifications set to Only @mentions | ☐ |
| 10 | Community features on, Membership Screening active | ☐ |
Print this or keep it open in a second tab while you work through your server settings. Ten checkboxes, thirty minutes, one well-built server.
Frequently Asked Questions
How long does a full Discord server setup take?
About 30 minutes if you follow this Discord server setup guide in order. Roles and channels take the longest (around 15 minutes), while verification, filters, and notifications take about 2 minutes each. Do not rush the roles step, because fixing permissions later takes far longer than setting them right the first time. This Discord server setup guide is ordered so the hardest decisions come while the server is still small.
Do I need Discord Nitro to set up my server properly?
No. Every setting in this Discord server setup guide works on the free version of Discord. Nitro gives you a custom profile and bigger uploads, and server boosts unlock perks like a vanity URL and better audio quality, but none of the 10 essential settings in this Discord server setup guide require payment.
What is the best verification level for a new server?
Start with Low, which requires members to have a verified email. It blocks the simplest spam bots without annoying real users. Raise it to Medium during spam waves, then lower it back. Avoid the Highest level unless you run a high-security community, because requiring phone verification drives away legitimate members.
Can I change these settings later?
Yes, every setting here can be changed at any time from Server Settings. But changing roles and channel permissions on a live server with hundreds of members is stressful and error-prone. That is exactly why this Discord server setup guide exists: do it right once, while the server is small and quiet. Future changes are always possible, but they cost more effort.
My invite link stopped working even though I set it to never expire. Why?
A “never expire” link can still break for other reasons: an admin deleted it, the server hit its member limit, or the person trying to join is banned. Discord’s invalid invite help page lists every cause. Generate a fresh link and check these in order, and you will find the culprit.
Conclusion
A well-set-up Discord server feels effortless to run because the hard decisions were made upfront. Verification level, content filter, roles, channels, invites, welcome screen, AutoMod, a moderation bot, sane notifications, and community features: these 10 settings are the entire foundation. Everything else, events, partnerships, custom emojis, is decoration on top of a solid base.
Work through the checklist above in one sitting, ideally before you invite your first wave of members. Bookmark this Discord server setup guide so you can revisit any setting later. Future you, managing a thriving community instead of fighting fires, will be glad you did. And
if you run a WhatsApp community too, check our active WhatsApp group links and latest guides for more community-building tips.